

Scrap Room Organizing Tips


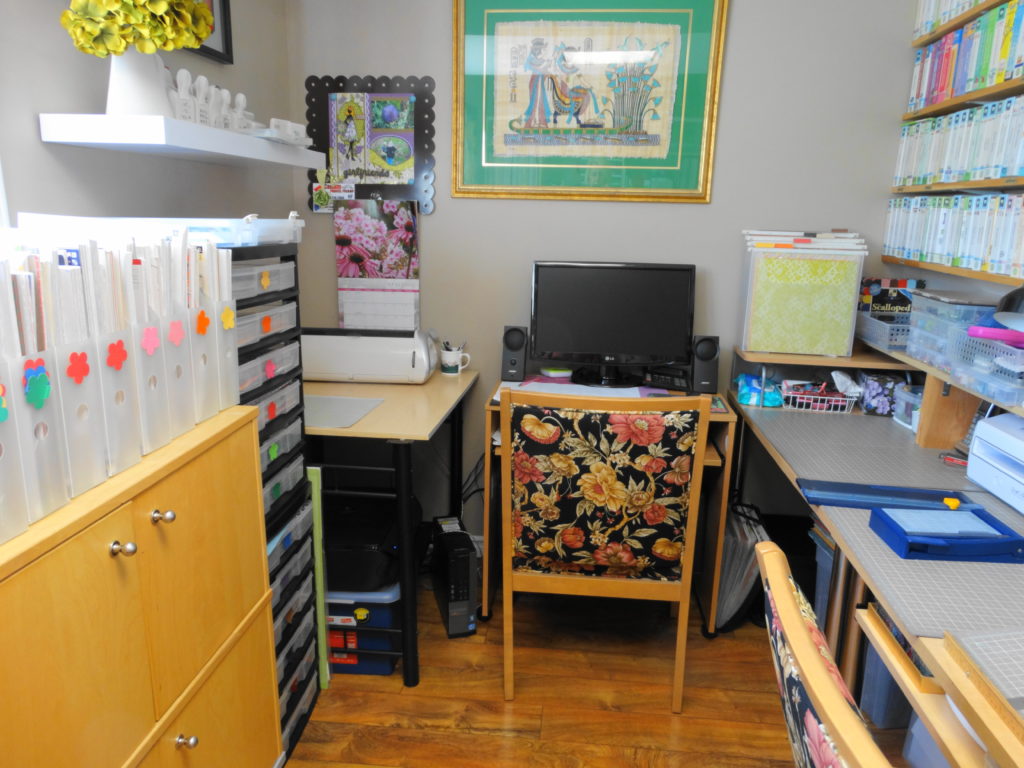

It is not my intent to boast about my stash, but to give you ideas and tell you why I have done some of these things. I know many have way more than I do, and many have less. The first pics are just to give you a sense of the room. I am hoping to paint it this winter. Since my scrap room is very small and I have accumulated so much over 12 years, I find that I must be very organized. I hate to waste time looking for things all the time. The room is only 7 1/2 feet by 14 feet long so it is rather long and skinny. I have 2 Ikea storage units that I love, since they hold 12×12 albums with room to spare as they are 17″ deep and also give me plenty of shelf space on top for my paper. They are full of paper. I also have 2 tables pushed together for a work space. I store bins and things under them as well. My husband hung shelves for all of my Cricut cartridges and there was space left for some punches. There is also a 2 drawer filing cabinet and a repurposed old wall unit for lots more organizing space. I am glad that I have a bright window for natural light and it overlooks my backyard. I try to use the wall space to maximize storage.
Visit my YouTube Channel and SUBSCRIBE, please! https://www.youtube.com/c/PatSkeatsMeandMyCricut
My Facebook Groups
Me and My Cricut.com Fans – Please join to share ideas and page layouts. Here is the link, you will have to copy & paste it – https://www.facebook.com/groups/meandmycricut.comfans/
Cricut Links To Design Space – This group is for those who want to save and share Design Space links of page layouts, images and card creations. Please join! Here is the link, you will have to copy & paste it – https://www.facebook.com/groups/cricutlinkstodesignspace/
JUST CLICK ON ANY CRICUT, SCRAPBOOK.COM, SPELLBINDERS OR MY MIND’S EYE AD ON THIS SITE FOR A LINK TO SHOP

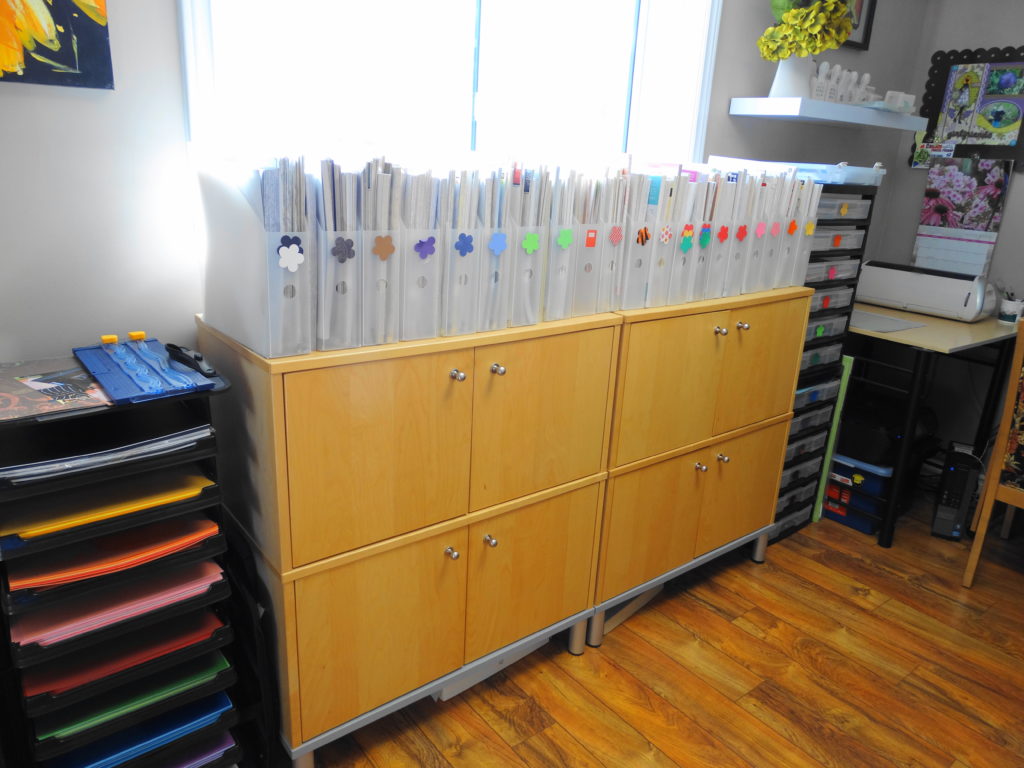
I have chosen to keep my printed paper pads or stacks in the 12×12 paper holders from Cropper Hopper for a few reasons. I need to be able to access my paper often so I like it out in the open! I like that I can see the papers and flip through them easily. I like that I can buy them over time and accumulate more as my paper collection grows. I like that they are not expensive and I can use coupons to buy them. I like that they are sturdy and not too heavy to handle when full. I like that I can fit 2 in a tote bag to take to a retreat and still be able to lift the tote bag into my trunk. You will notice that I use a very simple colour coding system. I just punched a flower out of each colour of paper and attached to the end of each holder. This is so that I can find a certain pad or colour of paper quickly, without searching everything. I keep the pads with mostly red prints in the red, blue prints in the blue etc.
My Facebook Groups
Me and My Cricut.com Fans – Please join to share ideas and page layouts. Here is the link, you will have to copy & paste it – https://www.facebook.com/groups/meandmycricut.comfans/
Cricut Links To Design Space – This group is for those who want to save and share Design Space links of page layouts, images and card creations. Please join! Here is the link, you will have to copy & paste it – https://www.facebook.com/groups/cricutlinkstodesignspace/
JUST CLICK ON ANY CRICUT, SCRAPBOOK.COM, SPELLBINDERS OR MY MIND’S EYE AD ON THIS SITE FOR A LINK TO SHOP
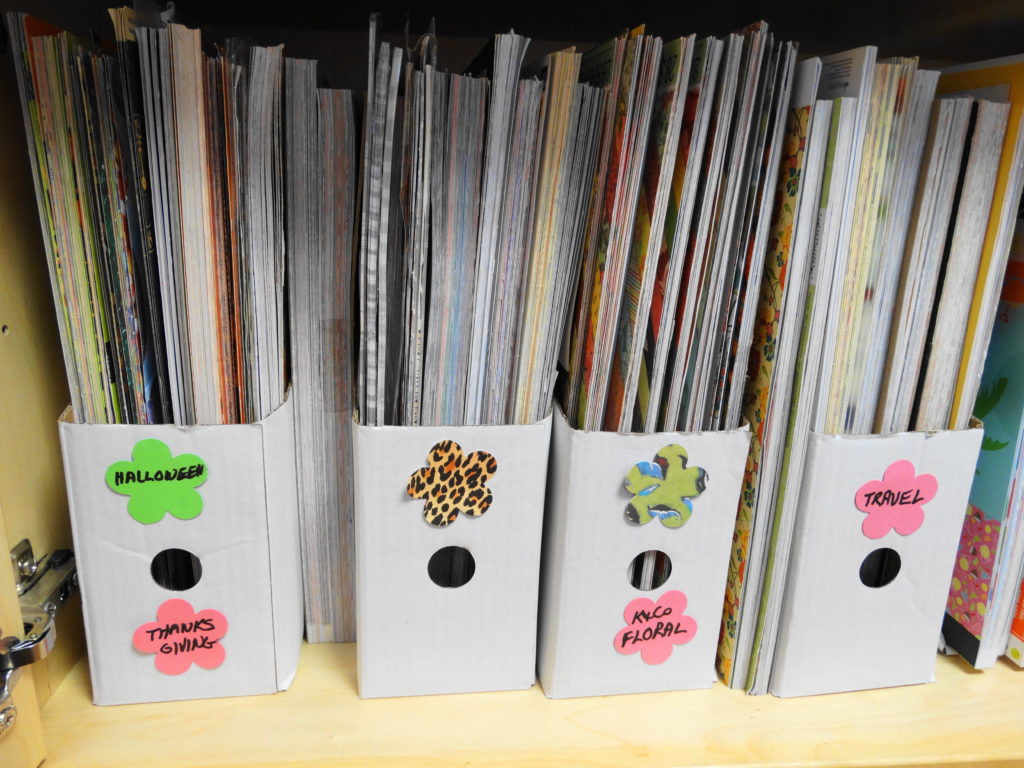
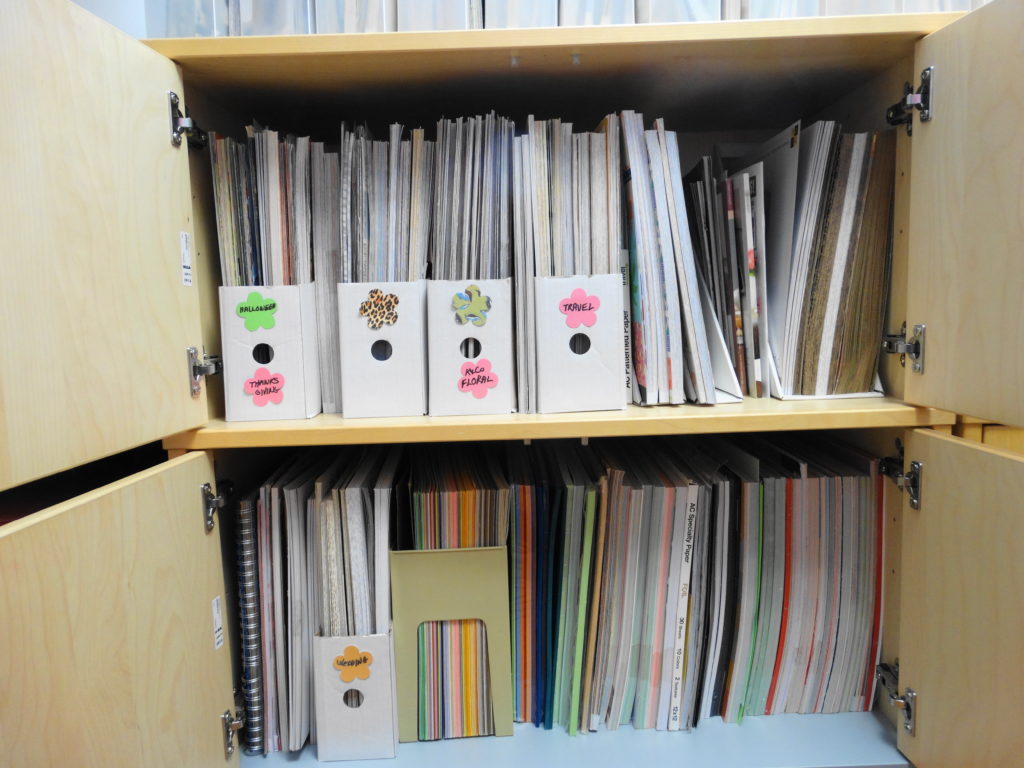
Left Photo: I also have holders for different categories of paper such as Wedding, Animal Prints, Halloween, K&Co Florals, Sports, Baby, School, Heritage, Pets, Christmas and Travel.
Right Photo: I buy packs of 8 1/2 x 11″ paper for matting photos and cutting Cricut images since it is far less expensive that way and storage the extra on a shelf inside the Ikea unit.
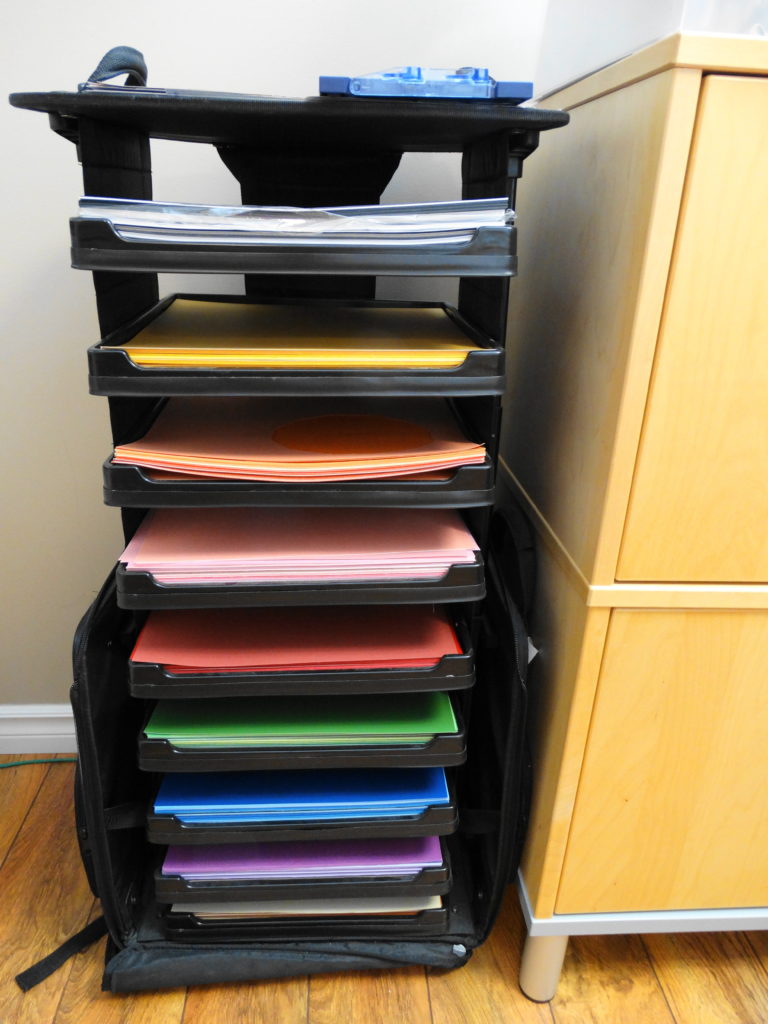

Left Photo: I keep my 12×12 solid coloured paper in this rolling cart that collapses for travel to retreats. They are no longer made, but other types of units are available. It is sorted by colour.
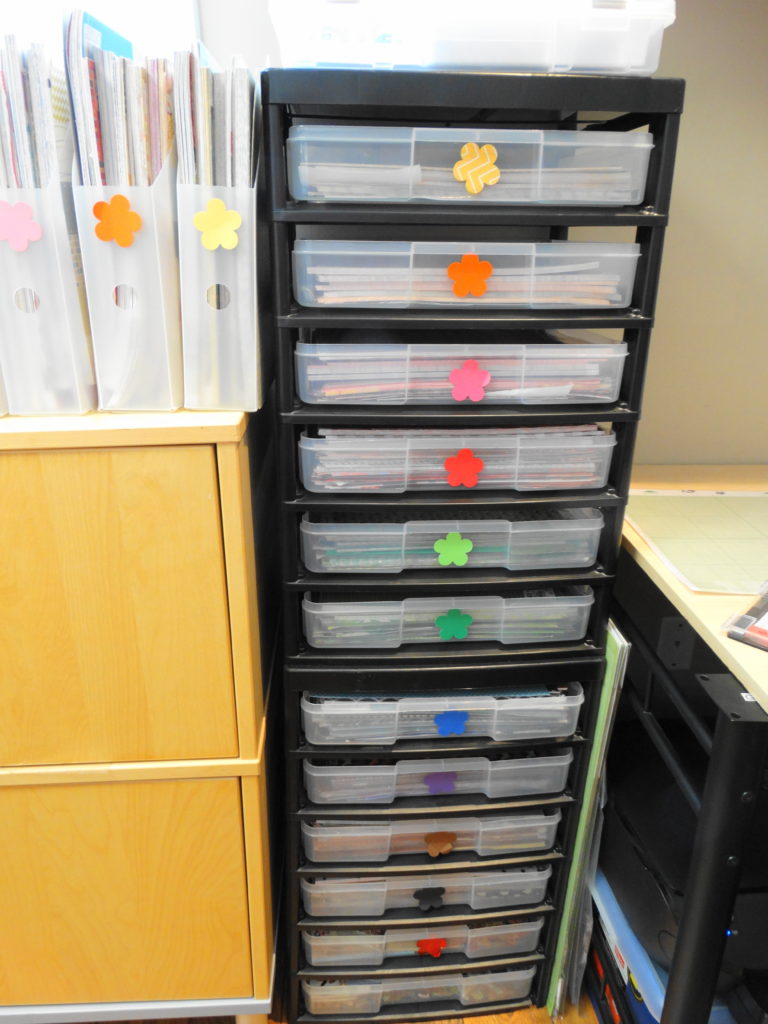
Right Photo: I use the coloured drawers on wheels in the right picture for my 8 1/2 x 11″ solid paper and my solid coloured scraps. It also is sorted by colour and I have punched flowers on the front of each drawer.
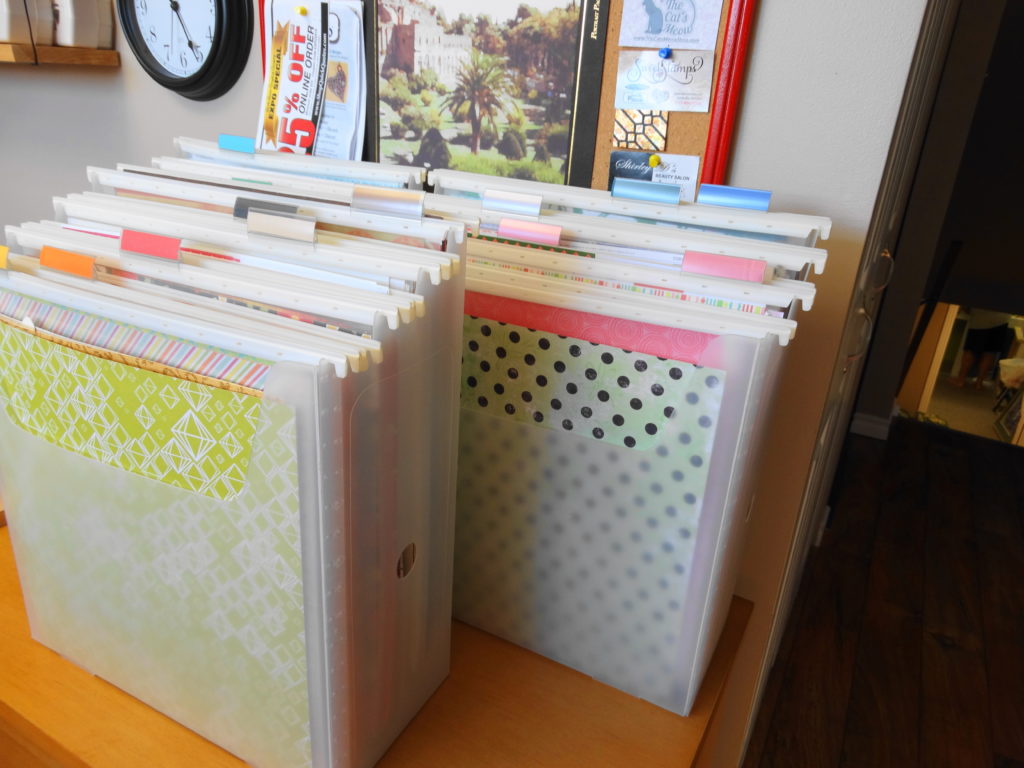
Left Photo: This is where I storage single sheets of patterned paper. It is higher at the back and slopes down towards the front , so it is easy to see the colour coded tabs. I have 3 of these all organized by colour. I got them on Ebay. I out grew this quickly!
Right Photo: When I out grew the one on the left, I purchased 2 of the drawer units and stacked them on top of each other in the right photo. It too is colour coded and for single sheets of printed papers. I had to get those after I discovered Tuesday Morning stores!


Left Photo: This item is a 12×12 rolling cart with drawers and is for my large scraps of printed papers. It also is colour coded for quick access. I keep a few old thin paper pads on top of this for easy access and I use them for cutting out test sizes for images.
Right Photo: This photo is a space I have for newer paper pads. I am running out of room and so this is in the wall unit. Since they are newer, I know to look there first when I am prepping new pages.
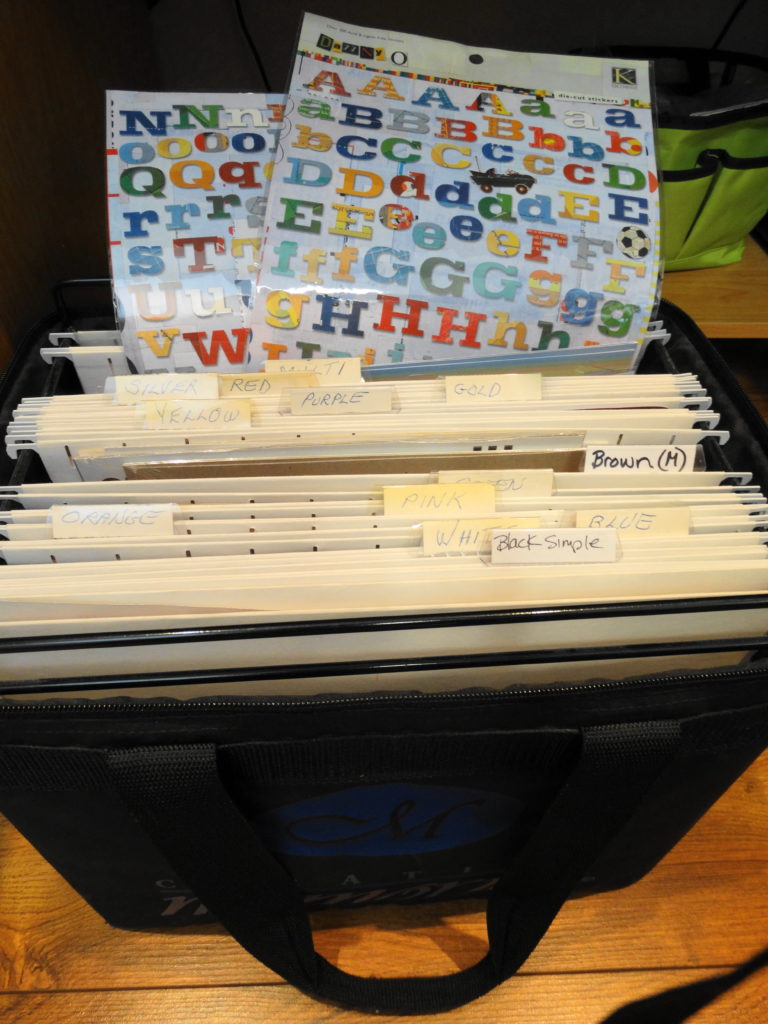

Left Photo: This is a Creative Memories file box which holds all of my stick on letters for titles. It is organized by colour also with the last file for multi-colours.
Right Photo: This is another Creative Memories file box for my “Specialty Papers”. I keep a section for water papers, trees, rocks, wood, nature, and all of my metallic papers are sorted by colour for easy access.


Left Photo: My Cricut cartridges are stored on open shelves for easy access. I refer to the back of the boxes for quick searching all the time. I have them arranged by category and within each category, they are arranged in alphabetical order. The categories are in alphabetical order too. They are Animals, Baby, Cards, Children, Christmas, Cricut Circle Club, Country, Disney, Fonts, Frames, Garden, Holidays, Halloween, Heritage, Kitchen, Pretty, Sports, Travel, Wedding, Words.
Right Photo: I have labelled the shelves with the categories for the cartridges.


Left Photo: I keep my A2 Embossing Folders in a photo box. They are sorted by category also. The catagories are in alphabetical order and are as follows: Animal, Brick, Circles, Damask, Flowers, Flourishes, Textures, Winter, Wood, Miscellaneous. I have another box for 5×7 folders. I use a drawer for my large 2×12 folders, 5×12 and the 8×12 folders.
Right Photo: I was told to always storage my markers laying down. It took me a long time to find this marker holder. They are sorted by style of pen and by colour. Before this, I had made my own with a shoe box and empty toilet paper rolls. I covered them with pretty paper and filled the box with them standing up. I glued them together, then turned the box on its side. I then could sort my markers by placing a different colour in each tube.


Left Photo: I keep my sticker embellishments in the 2 drawers of the filing cabinet. They are in legal sized folders to accommodate 12″ borders. I have organized them by category and they are in alphabetical order. If I can’t find my stuff, I can’t use it. The categories are as follows: Animals, Baby, Birthday, Borders, Butterflies, Christmas, Flowers (2 folders), Halloween, Juvenile, Masculine, Nature, School, Shapes, Special Themes, Sports, Teens, Travel (2 folders), Words or Titles.
Right Photo: The file cabinet is wide and holds regular size folders as well as legal size. In the regular folders, I keep gems. All of the flourishes and gems on acetate sheets are in folders sorted by colour.

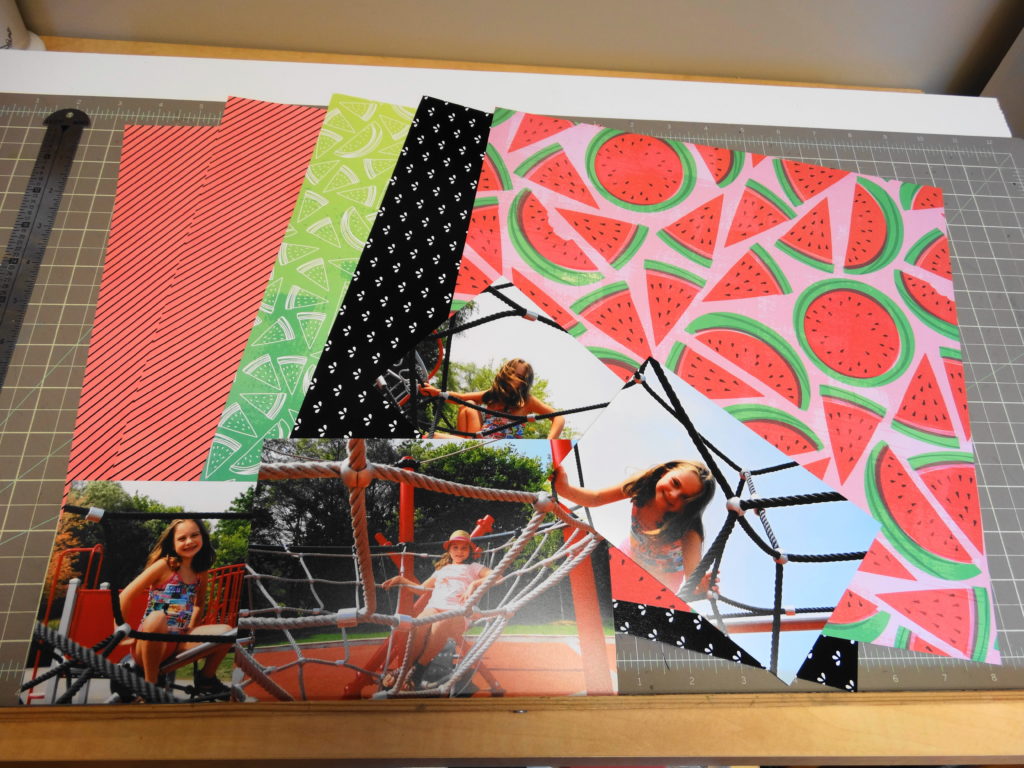
Left Photo: I have always used this Scrapfolio organizer to keep my prepped pages in. They are in order from front to back. When I am ready to start a new page, I just pull out the front one to work on.
Right Photo: When I prep a page, this what I prep. I have the pictures for a page and then I select a flattering background paper and a few coordinating sheets to go with it. I put them together with the photos on top. If I had purchased a special embellishment for that page, I would include it too.

Left Photo: I really like to have all of my tools at my fingertips, so I looked for the largest keyboard tray I could find to mount below the table right where I sit. On it I keep low containers of all the tools I use often, some inks and some two sided sponge lift dots. I also keep an old mug on the desk with some more tools in it. My metal ruler is on my desk at all times as I use it most.
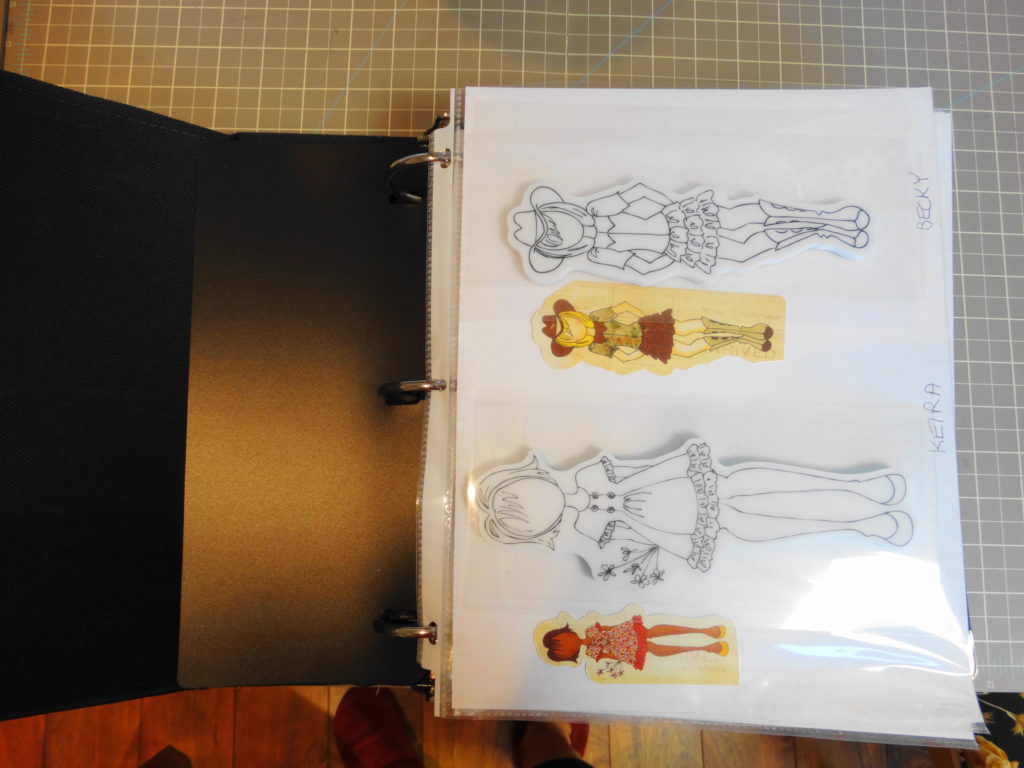
Right Photo: I joined the Julie Nutting Doll group and asked how people store their dolls. I got plenty of answers, but, the one I chose was a binder with page protectors. I glued the clear plastic sheet the dolls come with to a white sheet of 8 1/2 x 11 paper. Then I glued the photo from the packaging beside that. I labelled it with the doll’s name and placed the stamp with the sheet she is stuck to, on top of the clear sheet that I had previously glued. I fit 2 to a page. Now they are all neatly in a binder.
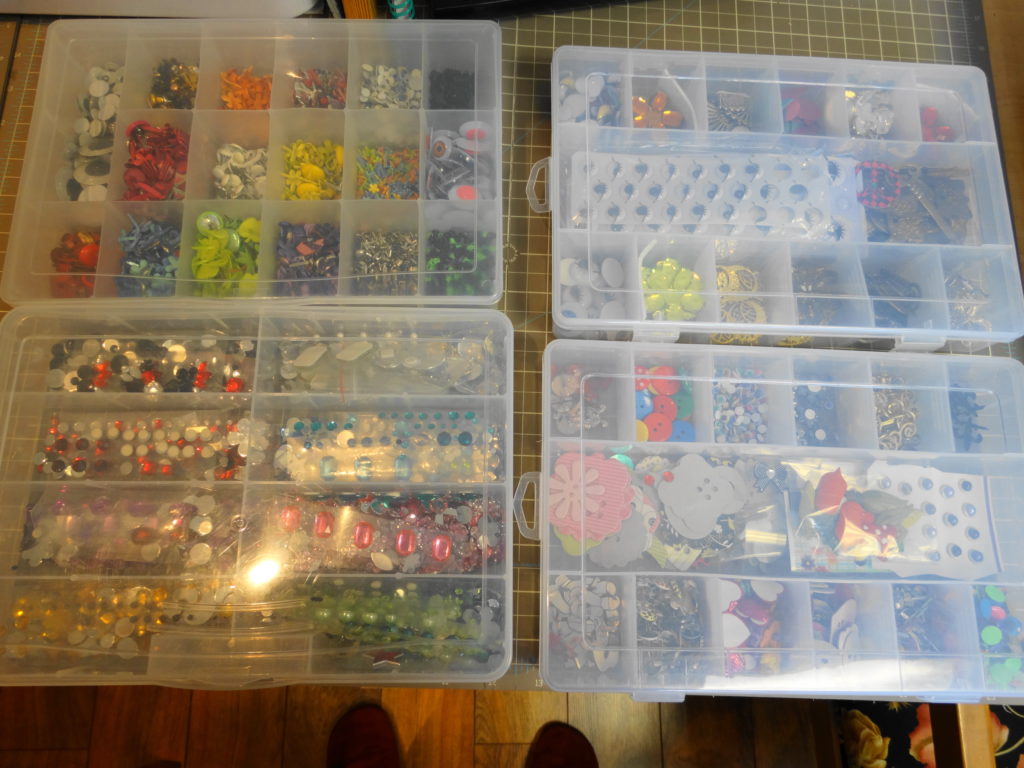

Left Photo: I use these divided containers for lots of small embellishments. I have 5 of them now and use 1 each for brads, gems, jewelery pieces and metal embelishments, googly eyes and 1 for ink daubers and sponges.
Right Photo: I divide them and sort them by colour or type of metal etc.


Left Photo: This wall unit adds so much storage space to my room and also allows me to display many things and my punches so that I can find them easily.
Right Photo: I used a tiered spice bottle organizer for my large Martha Stewart punches. It makes it a little easier to see and grab the punches.
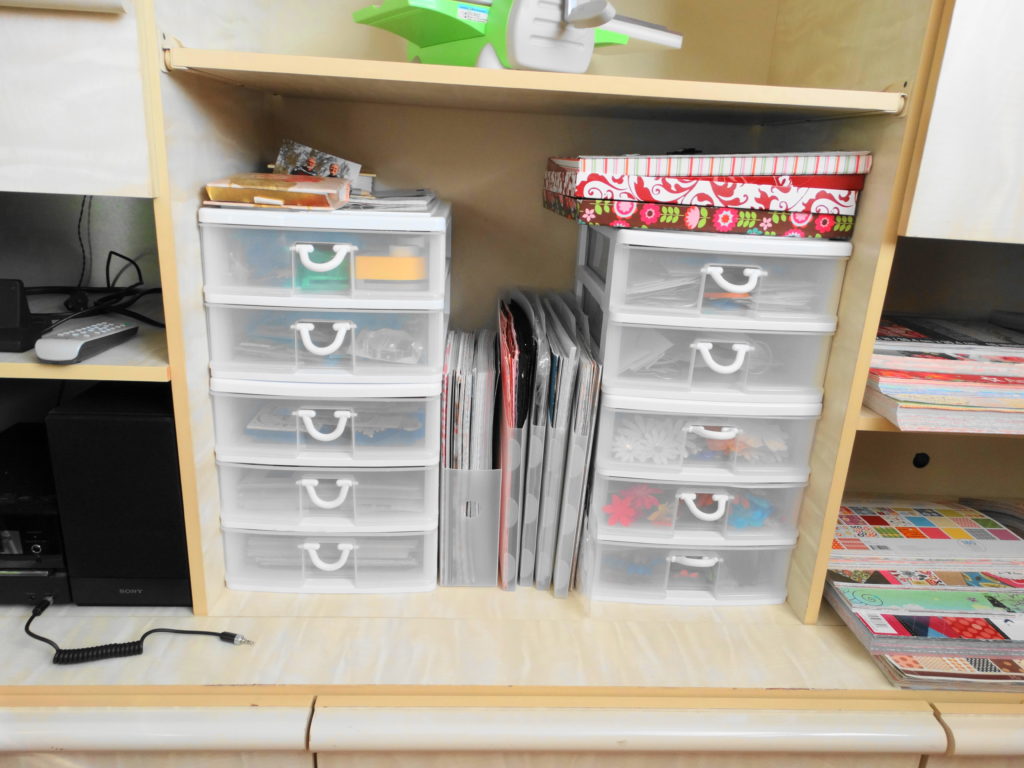

Left Photo: These are 8×11 stacking drawers that we all find so useful. I keep my Kiwi Lane border templates in one drawer and below that are the Kiwi Lane shapes.
Right Photo: The bottom 3 drawers are filled with flowers. I have sorted them into 3 groups – pastels, brights and dark tones to find them easily.
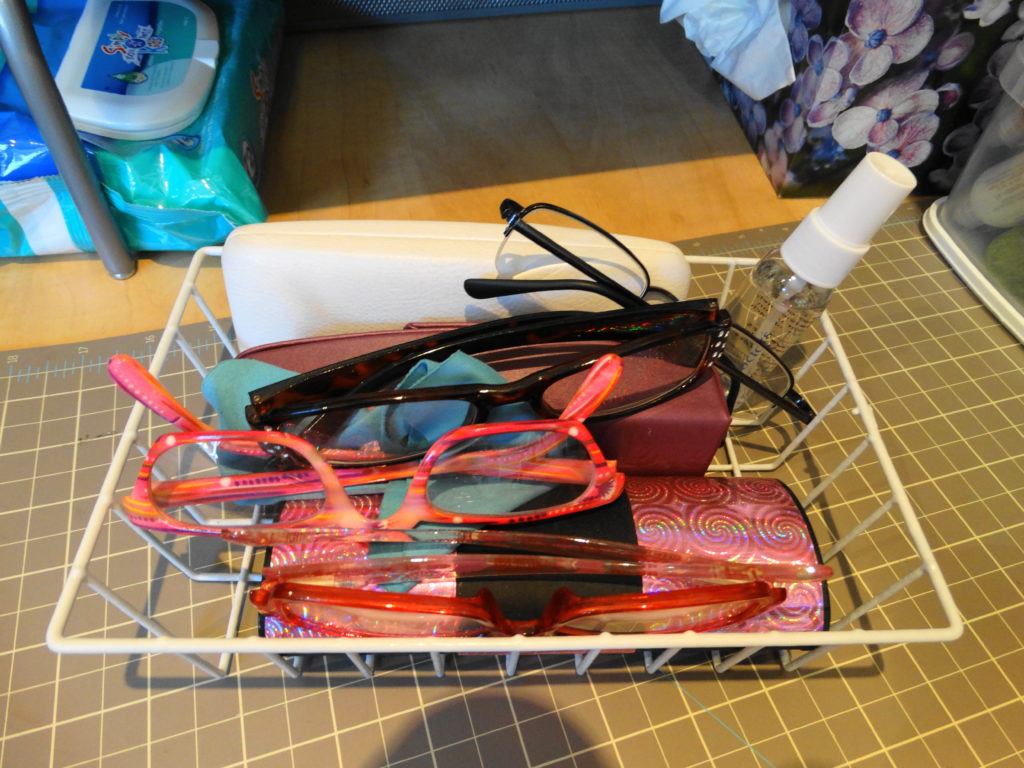
Left Photo: I keep a small bin of cheater eyeglasses on my work table for doing fine and detailed work. I also use them for looking at the Cricut images in the books. I have several different strengths of magnification and use what I need for the job at hand. I asked my eye doctor about this and he said it would not hurt my vision at all.
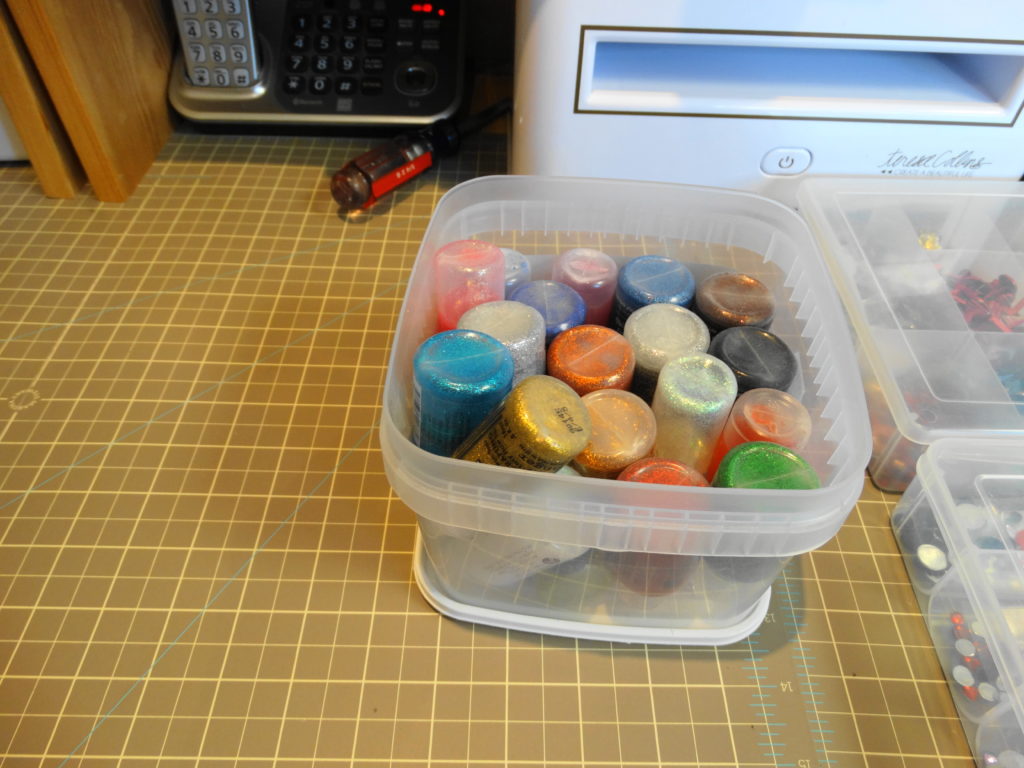
Left Photo: I keep my stickles bottles in an old Tupperware container upside down so the glitter does not fall to the bottom when I want to use it.

Left Photo: I originally purchased this 12×12 accordion folder for my scraps. I outgrew it quickly, but I love it for scraps at retreats. I fill it with 8×11 sheets and it opens so wide that I can easily find everything and it holds large and small scraps. I got it at Joann’s.
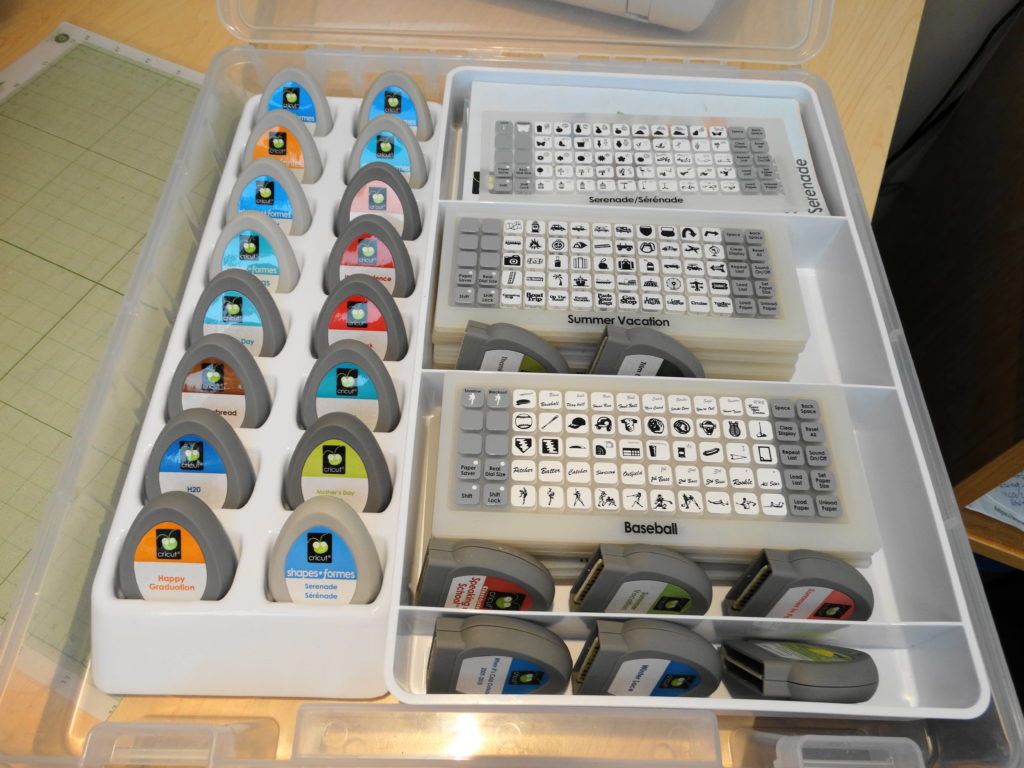
Right Photo: I purchased this Cricut cartridge holder for my Cricut Solutions cartridges at Michael’s. They are the ones without boxes. I put the keypads in the front 2 compartments and the pamphlets in the back. I keep them in alphabetical order and so are the pamphlets that go with them.
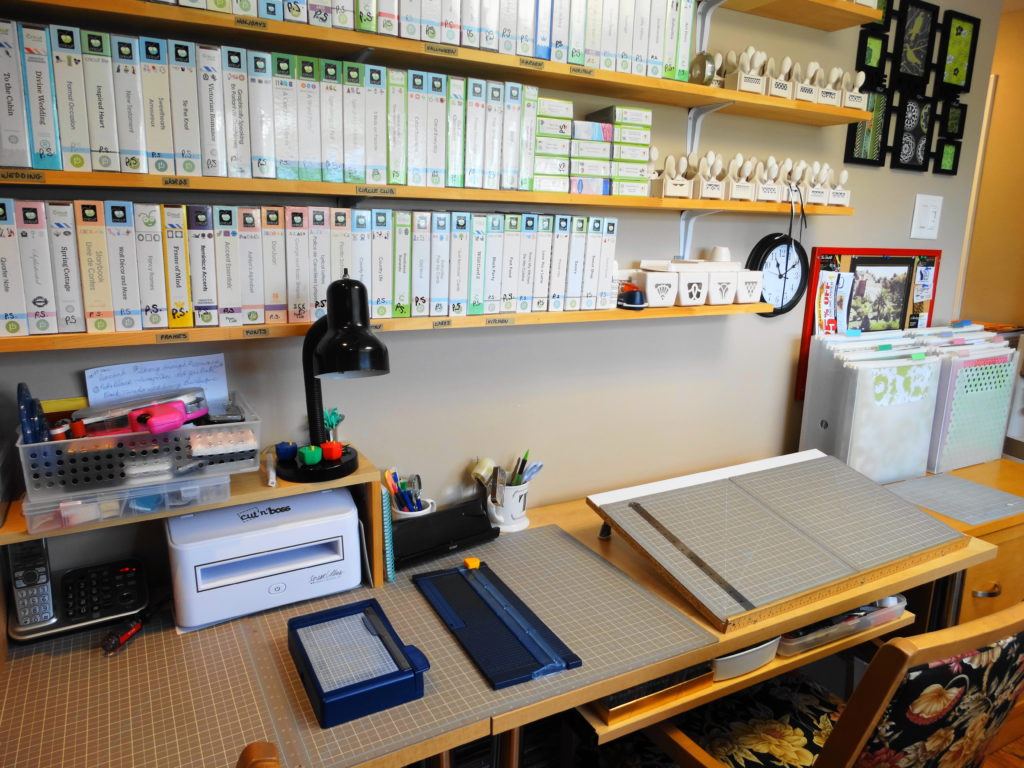

Left Photo: You will notice that I have an angled board at my workspace. I get a sore neck from scrapping long hours, so I asked my husband to build it for me. It is so simple. I used a 16″ deep piece of white shelving from Home Depot. It is just wide enough for 2 cutting mats to rest on it. Do not go wider as it will be difficult to reach other things in your work space. I got a wooden ruler and screwed it to the front for a pencil ledge and to keep my pages from sliding off. We then mounted 3 corner brackets across the underside at the back, being careful not to tilt the board too much. I did not want photos and things sliding down when I was working on a page. I then added thick felt pads so that I would not scratch my desk. There is a ready made version of this available at containyacrafts.com called Scrap’n Easel, but I wanted a very sturdy version so that I could cut on it. I also did not want magnets all over holding everything in place. I love it and when I took it to retreats there were many others who liked it too. A real neck saver for us oldies!
Right Photo: I keep an old mug on my Cricut table with tools to remove paper from the cutting mat.
Visit my YouTube Channel and SUBSCRIBE, please! https://www.youtube.com/c/PatSkeatsMeandMyCricut


Show Comments (0)
There are not comments on this post yet. Be the first one!